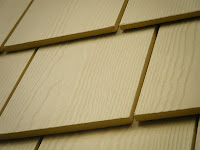
So here is the end result of my endeavors. I’m really happy with it. Next spring I will give my trim boards one more coat of paint. I never liked the way the plain siding looked before. It always looked like something was missing on this part. Perhaps I should give thanks to the carpenter bees for forcing me to do something. I lost track of how many hours it took me to complete this project. I estimate I had around 60 hours in this and working only on weekends. Making the shingles themselves did not take that long. It’s all of the prep work, painting, and cutting during installation that really slowed things down. I had six rows of shingles and only one row involved no cutting. You also see that I had guttering to go behind. I had to remove the guttering to trim it before reattaching. A helper could have made this significantly easier and faster. One guy could stay on the ladder or scaffold and the other could do the cutting.
I’d rate the level of difficulty of this project as moderate. I’ve never installed shingles before but I’ve built or remodeled a lot of stuff. Going around my arches was painful since you need to maintain the angle on the shingles, but you end up with no shingle underneath close to the trim board. In these cases, I used a cedar shim to maintain the angle. Final cost of materials (assuming I take back my extra siding) was about $200. This includes the siding, saw blades, nails, paint, and even the 2x4s I will keep. As with most projects, the real cost savings is in the labor. Good luck on your project if you decide to try this yourself, and remember to follow precautions to minimize the dust so it doesn’t get inhaled. Hopefully the tips will save you a little time.
(Caution: always follow the manufacturer’s instructions and best safety practices.)


No comments:
Post a Comment